Why Do I Here a Popping Noise When I Turn My Car Wheels to the Right and Back Straight Again
When information technology comes to driving, you want to feel as safe equally possible. So when you hear a clicking or popping sound coming from the car tires or wheels, it'southward natural to exist concerned. All vehicles demand to exist safe before operating them on any route with other traffic.
Clicking or popping sounds that come from the wheels could result from any the following components:
- Damaged constant velocity articulation
- Worn or damaged struts
- Loosely or broken hubcaps
- Worn drive chugalug or worn drive belt tensioner
- Tires of the incorrect size or worn with cupping
- Suspension being loose
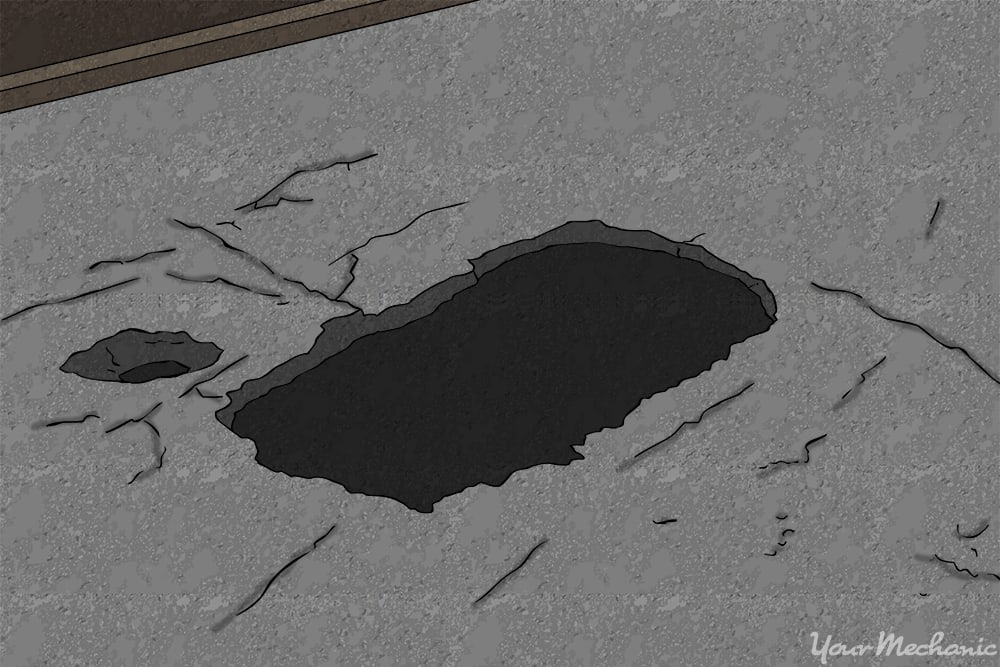
When it comes to diagnosing a clicking or popping audio from the wheels, a road test is required to make up one's mind the sound that's beingness emitted. Before you have the vehicle on a route examination, you would need to perform a walk around the vehicle to ensure that there is nothing falling off the vehicle.
Wait under the vehicle to see if whatever parts to the vehicle has cleaved off. If something is broken on the vehicle that is a condom item, you lot will need to accost the item first before conducting a road test. Also, exist sure to bank check the tire force per unit area. This keeps the vehicle from overheating the tires and allows y'all to do a correct examination.
Part i of six: Diagnosing a damaged constant velocity articulation

Footstep 1: Push downwards on the front and rear of the vehicle. This will check to see if the joints are locked up in a vertical motion.
Step ii: Showtime the engine. Turn the wheels from lock to lock going from right to left. This will check to see if the joints are locked up in a horizontal motion.
Step 3: Bulldoze the vehicle around the block. Make turns where you tin can turn the steering wheel all the way in a management. Listen for whatever clicking or popping sounds.
Usually the outer articulation takes all of the abuse and emits every bit clicking or popping sound during difficult turns. This is considering the assurance in the joint are worn and have no lubrication. The assurance fit into a muzzle that permit them to rotate as the wheels are rotating. The constant velocity joints make angles to an amazing 47 degrees.
Step iv: Drive the vehicle over bumps or potholes. This will check to run across if the CV joints will create a clicking or popping sound every bit the wheels are rotating and moving in a vertical direction.
After the route test, you volition need to prep the vehicle to check the abiding velocity shafts to ensure that they need to be replaced.
Preparing the vehicle to check the CV shafts
Materials Needed
- Flashlight
- Jack two ton or bigger
- Jack stands
- Wheel chocks
Step i: Park your vehicle on a flat, hard surface. Make sure that the manual is in park (for automatics) or in 1st gear (for manuals).
Step ii: Place wheel chocks around the rear tires that will be remaining on the basis. Appoint the parking restriction to the lock the rear tires from moving.
Step 3: Raise the vehicle. Using a floor jack that is recommended for the weight of the vehicle, lift under the vehicle at its specified jacking points until the wheels are completely off the ground.
Pace 4: Place the jack stands. The jack stands should go nether the jacking indicate locations. So lower the vehicle onto the jack stands. For well-nigh modernistic cars, the jacking points for jack stands volition be on the pinch weld just under the doors along the bottom of the car.
Checking the condition of the CV shaft
Step 1: Grab a flashlight and look at the joints boots. See if the boots are torn or missing whatsoever band clamps.
- Note: If there is grease around the boots and the boots are off of the joints or accept a cut in them, you tin can stop the diagnosis for that constant velocity shaft. Once the kick is off of torn, after 12 seconds of vehicle movement at normal atmospheric condition the CV joints go contaminated and begin immediate internal deterioration.
Step two: Grab the constant velocity shaft and push up and pull downward on it. This volition bank check to come across if in that location is excessive movement in the shaft joints.
Lowering the vehicle after performing the diagnosis
Step one: Collect all tools and your creeper and place them out of the way.
Step 2: Raise the vehicle. Using a floor jack that is recommended for the weight of the vehicle, lift under the vehicle at its specified jacking points until the wheels are completely off the ground.
Stride 3: Remove the jack stands and keep them far abroad from the vehicle.
Step 4: Lower the vehicle to where all four wheels are on the basis. Pull out the jack and put it aside.
Step v: Remove the wheel chocks from the rear wheels and put the bated.
Have your damaged constant velocity joint by a professional mechanic if it needs to exist replaced.
Part 2 of 6: Diagnosing worn or damaged struts
Step 1: Push down on the front and rear of the vehicle. This will check to see if the strut shocks are performing correctly. When the strut housing becomes dented, the strut shock volition pop in and out of the strut tube.
Footstep 2: Start the engine. Turn the wheels from lock to lock going from right to left. This volition check to see if the bearing plates volition brand a clicking or popping noise while the vehicle is stationary.
Step 3: Drive the vehicle around the block. Brand turns where you tin turn the steering bicycle all the way in a direction. Heed for any clicking or popping sounds.
The struts are designed to plow with the wheels every bit the struts have a mounting surface for the wheel hub. While checking the struts for sounds, feel the steering wheel for any motility as if the mounting bolts to the wheel hubs could be loose making the wheels movement in and out of alignment.
Footstep 4: Drive the vehicle over bumps or potholes. This checks the status of the strut shaft and if there are whatever broken internal parts or dented shell.
- Note: If you encounter oil present on the housing of the strut, you would demand to consider replacing the strut with a new or rebuilt strut.
Preparing the vehicle to check the struts
Materials Needed
- Flashlight
- Jack 2 ton or bigger
- Jack stands
- Pry bar
- Bicycle chocks
Step 1: Park your vehicle on a apartment, hard surface. Brand sure that the manual is in park (for automatics) or in 1st gear (for manuals).
Step ii: Place bike chocks around the rear tires that will exist remaining on the basis. Engage the parking brake to the lock the rear tires from moving.
Stride 3: Raise the vehicle. Using a floor jack that is recommended for the weight of the vehicle, lift under the vehicle at its specified jacking points until the wheels are completely off the ground.
Step 4: Place the jack stands. The jack stands should go under the jacking point locations. And then lower the vehicle onto the jack stands. For most modern cars, the jacking points for jack stands volition be on the pinch weld just nether the doors along the bottom of the car.
Checking the status of the struts
Step one: Grab a flashlight and expect at the struts. See if the housing to the struts are dented or leaking oil. Expect at the bearing plate to see if there it is separating. Check the mounting bolts to the hub and ensure that they are tight using a wrench.
Step 2: Grab a long pry bar. Pry up on the tires and check for whatsoever movement. Exist sure to run into where the movement is coming from. The wheels can move around if the ball articulation is worn, if the mounting hub bolts are loose, or if the hub bearing is worn or loose.
Step 3: Open up the hood to the engine compartment. Locate the mounting studs and nuts to the bearing plate. Check to meet if the bolts are tight using a wrench.
Lowering the vehicle later performing the diagnosis
Step 1: Collect all tools and your creeper and place them out of the way.
Step ii: Raise the vehicle. Using a floor jack that is recommended for the weight of the vehicle, lift under the vehicle at its specified jacking points until the wheels are completely off the footing.
Pace 3: Remove the jack stands and proceed them far away from the vehicle.
Step 4: Lower the vehicle to where all four wheels are on the ground. Pull out the jack and put it aside.
Footstep 5: Remove the bike chocks from the rear wheels and put the aside.
Have your worn or damaged struts replaced if necessary.
Part 3 of half-dozen: Diagnosing loosely or cleaved hubcaps
Step one: Drive the vehicle around the block. Make turns where you can turn the vehicle in multiple directions. Listen for any clicking or popping sounds.
Step two: Drive the vehicle over bumps or potholes. Listen for whatsoever clicking or popping sounds that can permit as the hubcaps motion around.
Pace 3: Drive the vehicle to speeds of 40 to 45 miles per hr. If the hubcaps are cracked, they volition brand a clicking or popping sound while current of air is passing through the hubcap at a great speed.
Preparing the vehicle to check the hubcaps
Materials Needed
- Flashlight
- Large flat screwdriver
- SAE/Metric socket set
- Wheel chocks
Footstep 1: Park your vehicle on a flat, hard surface. Make sure that the transmission is in park (for automatics) or in 1st gear (for manuals).
Step 2: Identify bike chocks around the rear tires that will exist remaining on the footing. Engage the parking restriction to the lock the rear tires from moving.
Checking the condition of the hubcaps
Step 1: Catch a flashlight and look at the hubcaps. Look at the hubcap for any impairment or cracks. Also, await at the hubcap to encounter if information technology was mounted correctly.
Sometimes when wheels are rotated or tires are replaced the hubcaps are installed incorrectly and cover up the valve stem to the tire. This will create a wobble and make the hubcap vibrate which will consult to creating cracks.
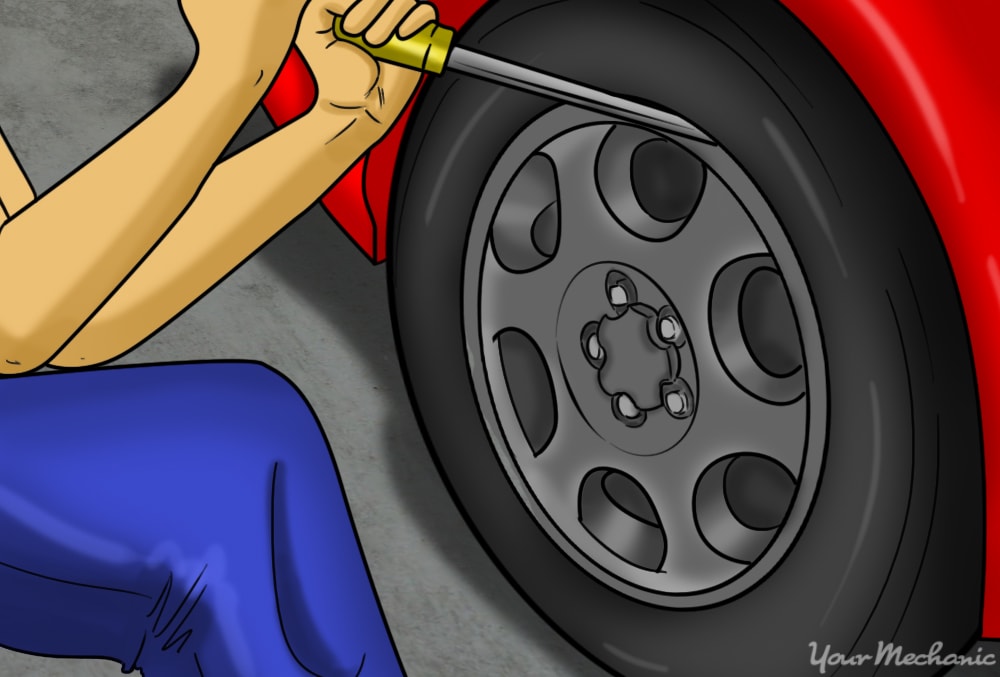
Footstep 2: Remove the hubcap. If you lot accept a hubcap that is mounted with plastic screw nuts, use a socket gear up to remove the hubcap. Check the mounting tabs or the inside ring for any damage.
Step iii: Put the hubcap dorsum on. If the hubcap was out of location, y'all would need to put it on correctly where the valve stem to the tire is visible. And so remove the bicycle chocks and take the vehicle for another road test to verify that was the problem.
If the hubcap all the same makes clicking or popping sounds, so there may be a fissure in information technology. Put the wheel chocks back on the vehicle and recheck for whatever cracks using your flashlight.
Cleaning up after performing the diagnosis
Step 1: Collect all tools and your creeper and place them out of the way. Remove the wheel chocks from the rear wheels and put the aside.
Part 4 of half-dozen: Diagnosing a worn bulldoze chugalug or a worn drive belt tensioner
Step 1: Put the central in the ignition and start the engine. Allow the engine to run for a few moments, so throttle the engine quickly.
Pace two: Equally the engine rises up and downwards in RPM, listen for a clicking or popping audio. As the drive belt or drive belt tensioner become worn, the chugalug stretches out and slaps the frame, fender, or a bracket.
Preparing the vehicle to bank check the drive chugalug or bulldoze belt tensioner
Materials Needed
- Flashlight
- Bike chocks
Step 1: Park your vehicle on a flat, hard surface. Brand sure that the manual is in park (for automatics) or in 1st gear (for manuals).
Step 2: Place bike chocks effectually the rear tires that volition be remaining on the footing. Appoint the parking restriction to the lock the rear tires from moving.
Checking the condition of the drive belt or bulldoze belt tensioner
Footstep 1: Open the hood to the vehicle's engine compartment. Grab a flashlight and check the drive belt and drive belt tensioner condition.
Footstep 2: With the engine off, catch the drive belt and pull on it. The chugalug should not motion easy and should but move its width in altitude.
Footstep 3: With the engine running, take someone step on the accelerator quickly. As the engine rises upwards and down, picket the belt and tensioner with a flashlight to see what the drive chugalug and drive belt tensioner is doing.
Cleaning up after performing the diagnosis
Step ane: Collect all tools and your creeper and place them out of the way. Remove the bike chocks from the rear wheels and put the aside.
Have your worn drive belt or worn drive belt tensioner replaced if necessary.
Part 5 of half-dozen: Diagnosing tires of the wrong size or worn with cupping
Materials Needed
- Flashlight
Stride ane: Grab a flashlight and visually check the tires of the vehicle. Wait for whatever abnormal wear to the tires as the vehicle is sitting at residue.
Stride two: Drive the vehicle around the cake. Brand turns where you tin can plow the steering wheel all the fashion in a direction. Heed for any clicking or popping sounds. The tires are designed to brand contact with the road at all times and create a absorber when driving.
If the tires are cupped or have different wear patterns, and then the tire may not stay connected to the route making the ride uncomfortable with clicking or popping noises. While checking the tires for sounds, feel the steering wheel for whatsoever movement as if the tires move in and out of alignment with abnormal tread wear.
Footstep 4: Drive the vehicle over bumps or potholes. This checks the condition of the rebound response within the tires and shocks to the vehicle. Shocks are designed to keep the tires in contact with the road at all times. However, when the tires take cupping, them tires tend to feel bumpy and make the driver recollect that at that place is a trouble with a shock absorber.
Preparing the vehicle to bank check the tires
Materials Needed
- Flashlight
- Jack ii ton or bigger
- Jack stands
- Wheel chocks
Stride 1: Park your vehicle on a flat, hard surface. Make sure that the manual is in park (for automatics) or in 1st gear (for manuals).
Stride 2: Place bike chocks effectually the rear tires that will be remaining on the ground. Engage the parking brake to the lock the rear tires from moving.
Step iii: Raise the vehicle. Using a flooring jack that is recommended for the weight of the vehicle, lift under the vehicle at its specified jacking points until the wheels are completely off the ground.
Stride 4: Place the jack stands. The jack stands should go under the jacking bespeak locations. Then lower the vehicle onto the jack stands. For most modernistic cars, the jacking points for jack stands volition be on the pinch weld just under the doors forth the lesser of the motorcar.
Checking the condition of the tires
Step 1: Catch your flashlight and visually cheque the tires. Remove the parking brake if you are working on the rear tires and put the transmission in neutral if you are working on the front tires to a front wheel drive vehicle. You may have to put the manual in neutral if working on the rear tires. It all depends if yous have an automatic or transmission transmission.
Stride 2: Rotate the tires and wait for whatever cupping of the tread. Also look at the tread for any other patterns that would indicate an alignment consequence.
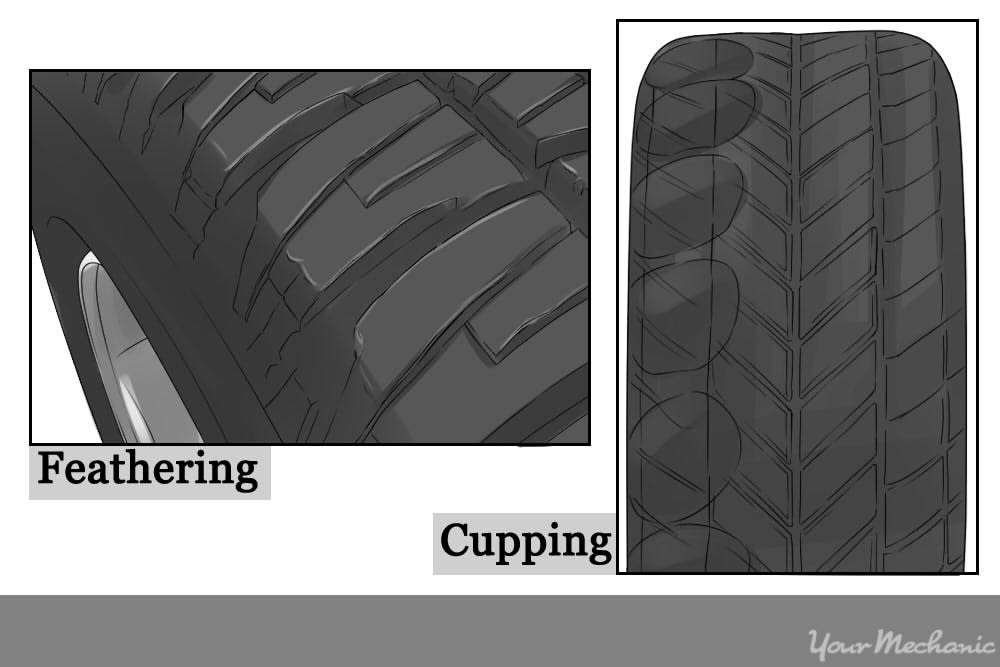
- Note: If the tires are cupping on the tread, then the stupor absorbers are worn out and not keeping the tires from billowy during curl oscillations. You lot would demand to replace the tires and stupor absorbers. If the shock absorbers have already been replaced, and so the tires demand to be replaced for prophylactic.
Lowering the vehicle after performing the diagnosis
Step 1: Collect all tools and your creeper and place them out of the way.
Step 2: Heighten the vehicle. Using a floor jack that is recommended for the weight of the vehicle, lift under the vehicle at its specified jacking points until the wheels are completely off the basis.
Pace three: Remove the jack stands and keep them far abroad from the vehicle.
Step 4: Lower the vehicle to where all four wheels are on the ground. Pull out the jack and put it aside.
Step v: Remove the wheel chocks from the rear wheels and put the aside.
Accept your tires inspected if they're the wrong size or worn with cupping.
Part vi of half-dozen: Diagnosing loose interruption
Materials Needed
- Flashlight
Intermission parts tend to vesture out on vehicles over time during normal road atmospheric condition. Most vehicles are driven on other areas rather than just on roads. Almost operators tend to call up that cars are similar trucks and can take off-road adventures with no problems. This results in wearing out the pause parts more frequently.
Vehicles with massive suspension lifts are in danger of suspension parts declining. There are lots of suspension parts involved with vehicles that are lifted and require more than attention than a standard suspension organization.
Step 1: Grab a flashlight and visually check the intermission of the vehicle. Look for any damaged or broken interruption parts.
- Note: If you run into any broken suspension parts, y'all will need to take information technology repaired prior to examination driving the vehicle. This would result is a safe thing that needs to exist addressed.
Step ii: Drive the vehicle around the cake. Listen for any clicking or popping sounds.
Step 3: Drive the vehicle over bumps or potholes. This checks the condition of the intermission as the tires and interruption moves effectually.
Stride 4: Step on the brakes hard and accelerate hard from a stop. This will check for whatever horizontal move within the suspension arrangement. A loose break bushing may non transmit noise when in normal performance, but can move around during a hard stop and fast take off.
- Note: If your vehicle has been in an accident before, the suspension could be set back on the frame to fix an alignment issue. The set back can issue in issues with the suspension coming loose or deteriorating the bushing faster than normal.
Preparing the vehicle to bank check the intermission
Materials Needed
- Flashlight
- Jack (2 ton or bigger)
- Jack stands
- Long pry bar
- Wheel chocks
Footstep 1: Park your vehicle on a flat, difficult surface. Make sure that the transmission is in park (for automatics) or in first gear (for manuals).
Step two: Place wheel chocks around the rear tires that will be remaining on the ground. Engage the parking restriction to the lock the rear tires from moving.
Step three: Raise the vehicle. Using a floor jack that is recommended for the weight of the vehicle, lift under the vehicle at its specified jacking points until the wheels are completely off the ground.
Stride 4: Place the jack stands. The jack stands should go under the jacking point locations. Then lower the vehicle onto the jack stands. For almost modern cars, the jacking points for jack stands will exist on the pinch weld just nether the doors along the bottom of the car.
Checking the condition of the suspension
Footstep 1: Grab a flashlight and wait at the interruption system. See if the parts are damaged, bent, or loose. Check the mounting bolts to the knuckle and ensure that they are tight using a wrench.
Pace ii: Grab a long pry bar. Pry up on the tires and check for any movement. Exist certain to see where the movement is coming from. The wheels can move effectually if the ball joint is worn, if the mounting knuckle bolts are loose, or if the hub bearing is worn or loose.
Stride 3: Open the hood to the engine compartment. Locate the mounting bolts to the interruption arms. Bank check to see if the bolts are tight using a wrench.
- Note: If your suspension is a strut then you lot need to bank check the strut for any damage or looseness. Refer dorsum to the section of this commodity nigh worn or damaged struts.
Lowering the vehicle later performing the diagnosis
Step one: Collect all tools and your creeper and identify them out of the way.
Pace 2: Enhance the vehicle. Using a flooring jack that is recommended for the weight of the vehicle, lift under the vehicle at its specified jacking points until the wheels are completely off the ground.
Footstep three: Remove the jack stands and continue them far away from the vehicle.
Pace 4: Lower the vehicle to where all 4 wheels are on the ground. Pull out the jack and put information technology aside.
Footstep 5: Remove the cycle chocks from the rear wheels and put the aside.
Have your suspension inspected if it's loose.
Fixing the clicking or popping sound from the wheels can help improve the drivability of the vehicle.
The statements expressed above are only for advisory purposes and should be independently verified. Delight encounter our terms of service for more details
Source: https://www.yourmechanic.com/article/how-to-troubleshoot-a-clicking-or-popping-sound-in-car-wheels-by-marvin-sunderland
0 Response to "Why Do I Here a Popping Noise When I Turn My Car Wheels to the Right and Back Straight Again"
Post a Comment